

Are you ready for more tips for the beginner food photographer? I sure hope so. Before we get to it, here are the links to Part I and Part II, and scroll to the bottom for Part IV. And if you’re not already signed up for my Food Photography Snapshot (i.e., newsletter), be sure to do that over on the Resources Page.
[Note: I originally wrote this series in 2017, but updated it significantly in 2019.]
In Part II of this series, I gabbed about composition. Today, I want to talk about the importance of a tripod, food props, and food styling.
5. Learn the Magic of a Tripod
When I first started photographing food, I didn’t use a tripod and I didn’t understand the importance of using one. Starting to use a tripod* on a regular basis is one of the major things that really improved my food photography. Here’s are four key reasons why you should use a tripod when you’re photographing food (at least some of the time, or in my case, almost all of the time).
*I use two primary tripods for my photography. You can see which ones I use here!
A tripod affords complete stability
If you remember Tip #3 from Part I of this series, the lower your shutter speed is, the more motion blur you’ll have in your photos. While motion blur can create some beautiful art if you’re waving glow sticks at a rave, motion blur in food photography is almost always unwanted. It results in photos that aren’t sharp and that appear fuzzy.
And no matter how many planks you do at the gym, your contracted abs can only hold you so steady when you hold a camera. You will always be moving at least a little bit when you photograph free-hand. If you are clumsy like me and move a lot while your camera sensor is capturing a photo, you will likely end up with motion blur.
If you have a fast enough shutter speed, say 1/250 of a second or faster, you may not see any noticeable differences in sharpness between a photograph taken free-hand and a photograph taken with a tripod. But if your shutter speed is on the lower end, you will most definitely get some unwanted motion blur.
Not only does using a tripod avoid that (it stabilizes the camera in place so it’s not affected by your imperfectly perfect human body movements), but it can also help you achieve so much more in your photography!
Taken with a tripod, shutter speed 1/200
A tripod enables you to take crisp, clear photos in low light
One of the things a tripod can help you do is take crispy clear photos even in low light. In Part I, I mentioned that, if you are shooting in low light, you will need to do at least one of the following things to add light:
-
Use a wide aperture (e.g., a low f-stop such as f/3.2;
-
Use a slow shutter speed (e.g., 1/20);
-
Use a high ISO value (e.g., 1600).
But if you want your photos to come out crispy clear and without any grain, you’ll want to leave your ISO low. If you opt for a low ISO value and are shooting in low light, your shutter speed will be quite low, particularly if your aperture is narrow (e.g., f/11). And with a low shutter speed, it will be impossible to shoot free-hand without having some motion blur.
A tripod solves this problem because the tripod holds the camera steady without any movement. With a tripod, you can use a very low shutter speed, even as low as 1 full second, and still capture a sharp photo due to the lack of camera movement.
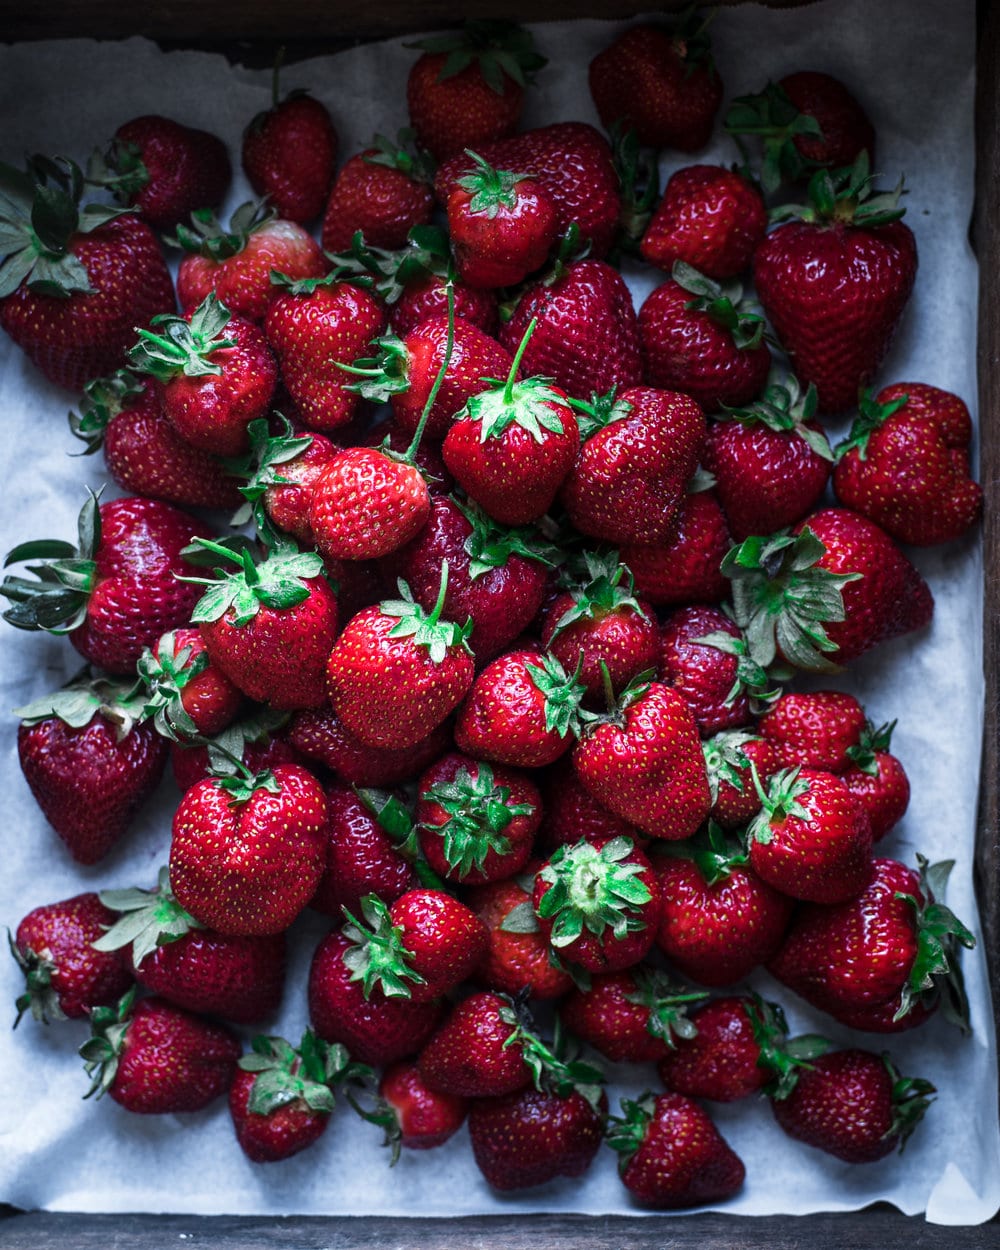
ISO 100, shutter speed 1/10. I took this shot an hour before sunset, when there was not too much light available. But as you can see, the details are still very crisp and sharp because I used a low ISO.
A tripod replicates the same angles
With a tripod, you can also replicate the same exact shot at the same exact angle because the position and angle of the camera will be the same. In contrast, when shooting free-hand, your body and position will inevitably move around, even if you don’t think it is.
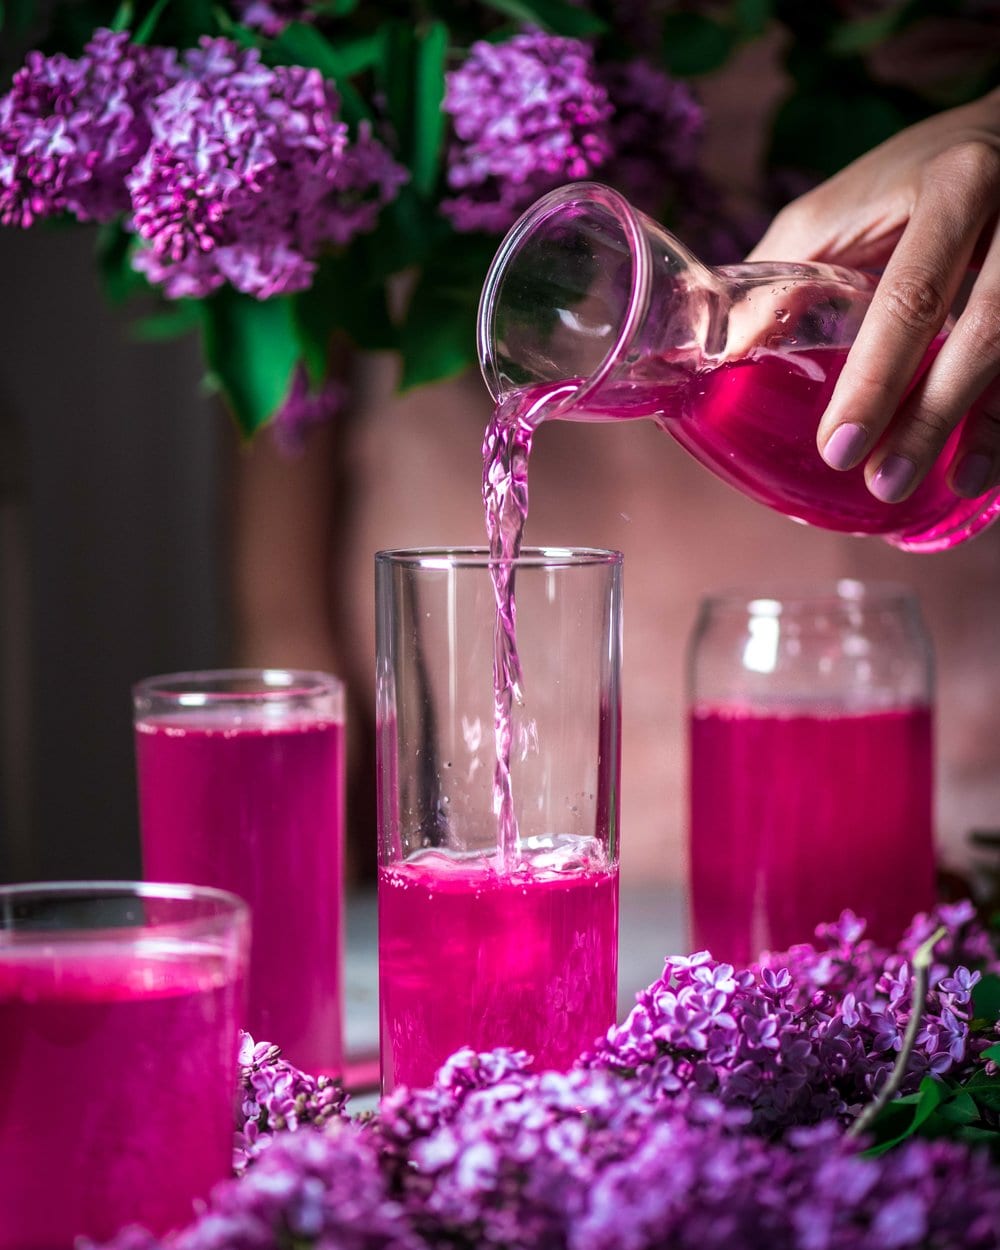
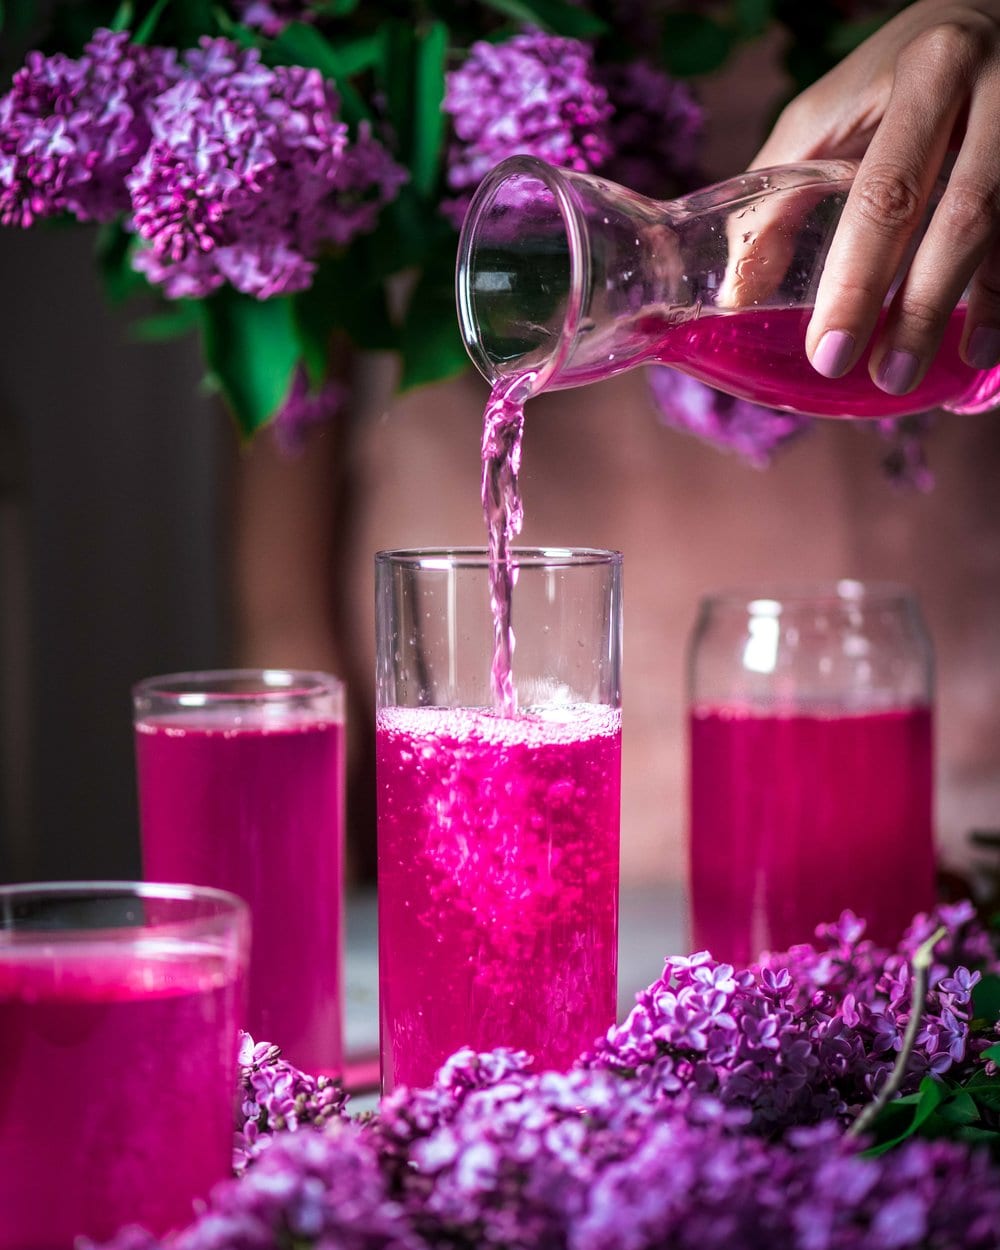
Why would you want to replicate the same shot in the first place? Perhaps you’re testing out different aperture values and want to compare the same shot at f/2.8 and f/4.5. Or, perhaps you want to change a few elements of styling or prop arrangement but otherwise keep the frame the same, and want to compare the differences. Or, perhaps you want to make a stop motion video or a GIF of pouring juice in a glass (each frame will need to have the exact same angle and position in order for the video to look good).
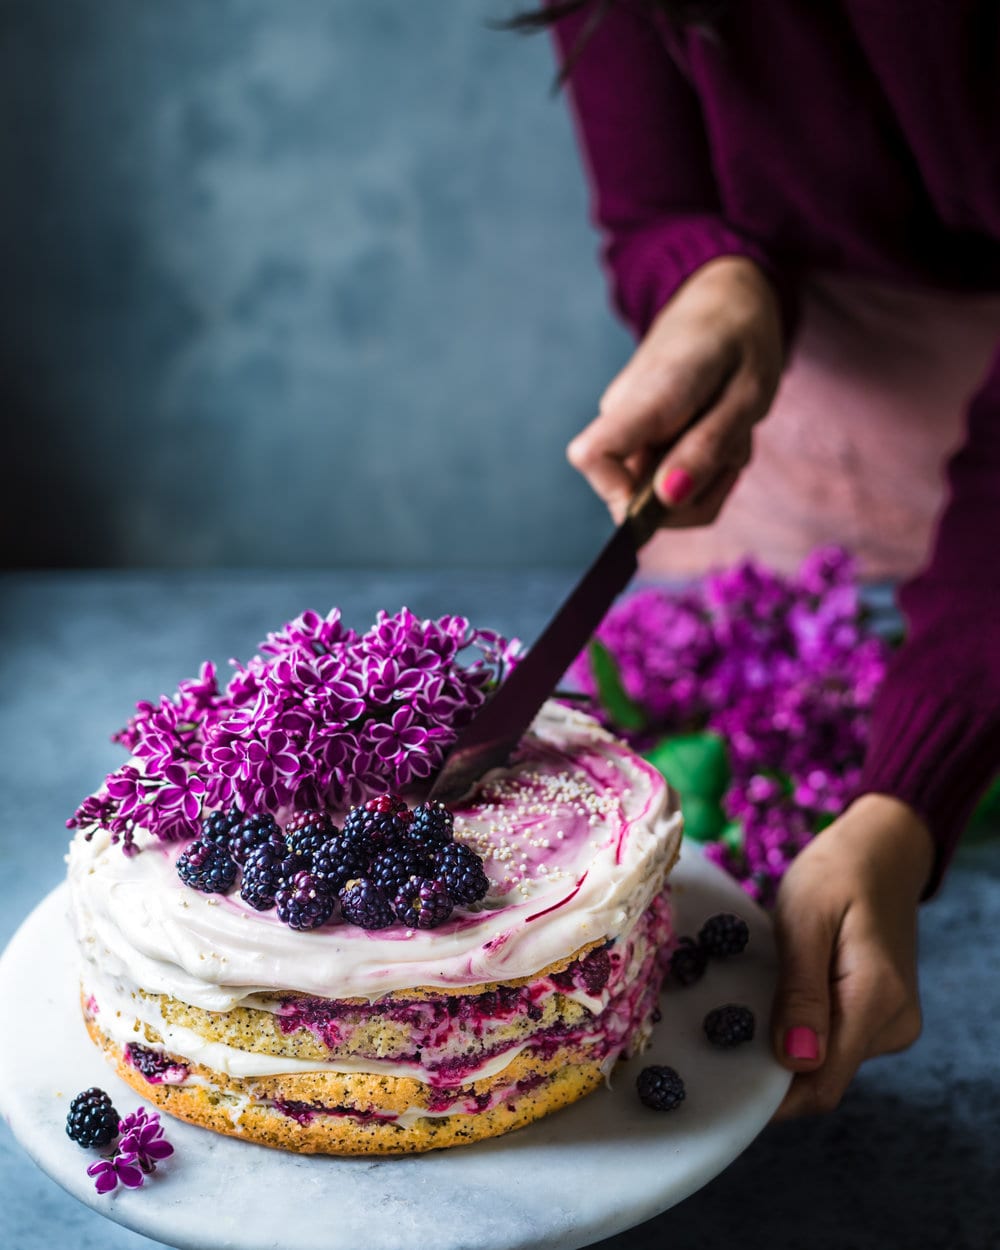
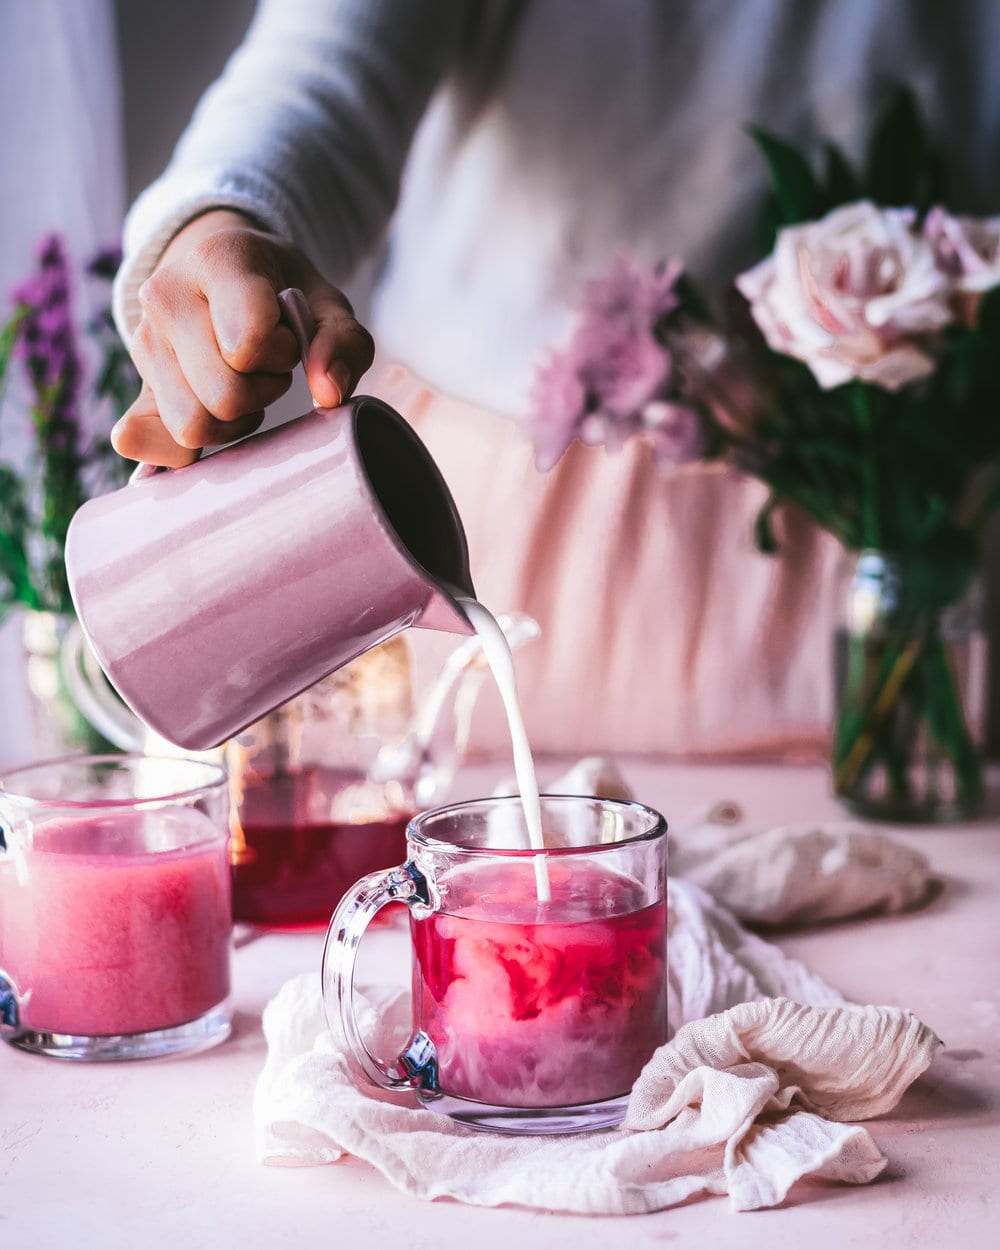
A tripod enables you to tell a story
And of course, if you want to take those amazing maple syrup pour shots or show your own hands or body in a photo, you’ll need a tripod. Unless you have 4 hands and can manage it all once. Or an assistant.
I don’t have an assistant or four hands (crazy, I know), so I rely on my trusty tripod when I want to use movement or action in my photos. Also, you don’t need a tripod to tell a good food story, but it certainly helps when you want to add in movement or dynamism.
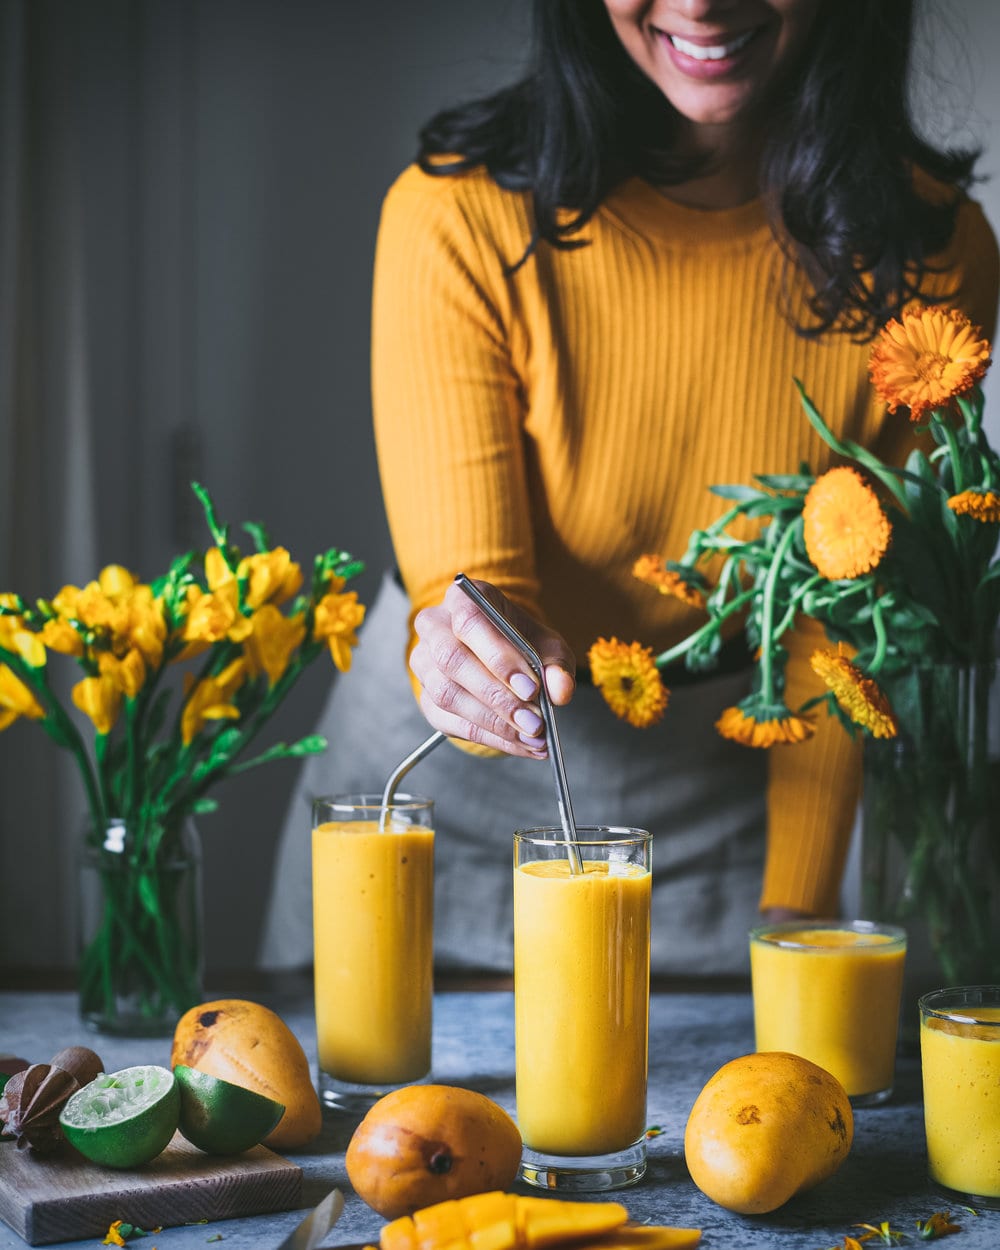
It took me about 10 attempts before my hands didn’t look awkward/enormous placing a straw in the glass. Because I used a tripod, I was able to compare each photo with the exact same composition/framing.
6. Invest in a Few High-Quality Food Props
These next two tips are specific to food styling, and I am excited to share them with beginners with the hope that they will help you avoid the mistakes I made when I first started out.
When I first started out with food photography, I was eager to get started, so I bought the first props I saw at kitchen and home goods stores, and I bought a lot. But, in an effort to save money, I would buy inexpensive items or shop at bargain stores (not cutesy thrift stores). However, I ended up wasting money because I grew tired of the hodgepodge mix of props that I collected. Plus, they simply looked cheap. Think multicolored dishtowels sold in 6 packs, a floral printed coffee mug, and bright orange measuring spoons. That’s why I now suggest investing in a few high-quality food props—emphasis on both few and quality.
These days I don’t buy food props nearly as often, but when I do, I buy items of quality. That doesn’t necessarily mean they’re expensive, though. If you scour (and I mean, really scour) Etsy and Ebay, you can find some amazing vintage items for a reasonable price. For more typical food props such as glasses or plates, subscribe to the mailing lists of stores like Crate & Barrel, CB2, West Elm, and Sur La Table to find out when they’re having sales. And don’t forget to check out your local thrift stores and flea markets.
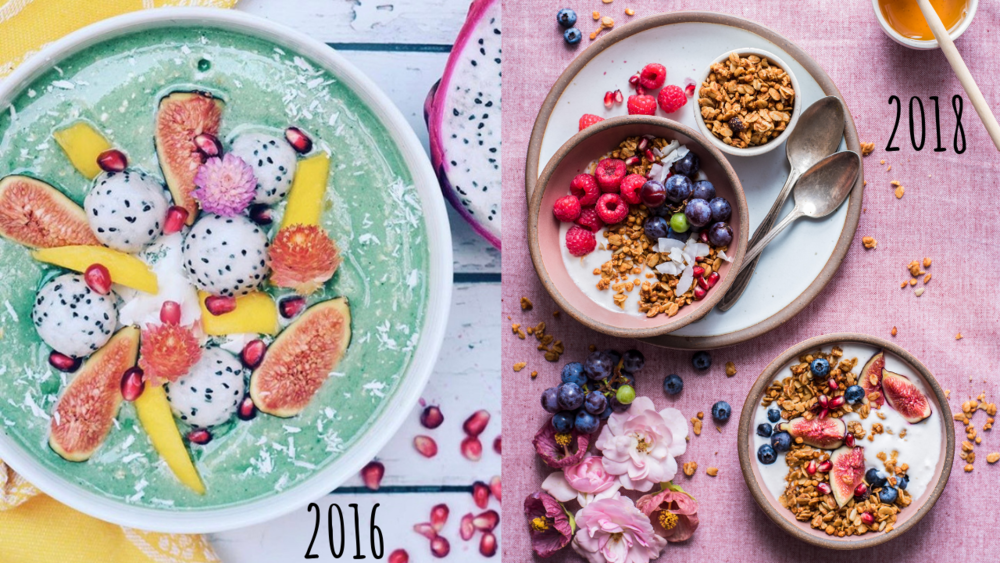
In the example below, you’ll see that when I started food photography in 2016, my props looked, well, cheap. I was using brightly colored linens and poor-quality vinyl surfaces instead of investing in a professional photography surface (there are some higher-quality vinyl surfaces out there, but I wasn’t using them and, in any event, my photography skills were not strong enough to make the surface look good). Fast forward to 2018, and I’ve invested in high-quality ceramics and vintage flatware. More on my essential food photography props in a future post!
7. Get to Know your Food Styling Style
Over time, you will become more familiar in your own skin, and you will develop your own food style. In the beginning stages, think about which food photographers you admire and study their style. Not to copy it. That would be rude. But to help find your own inspiration for the colors, shapes, patterns, textures, and moods that you like.
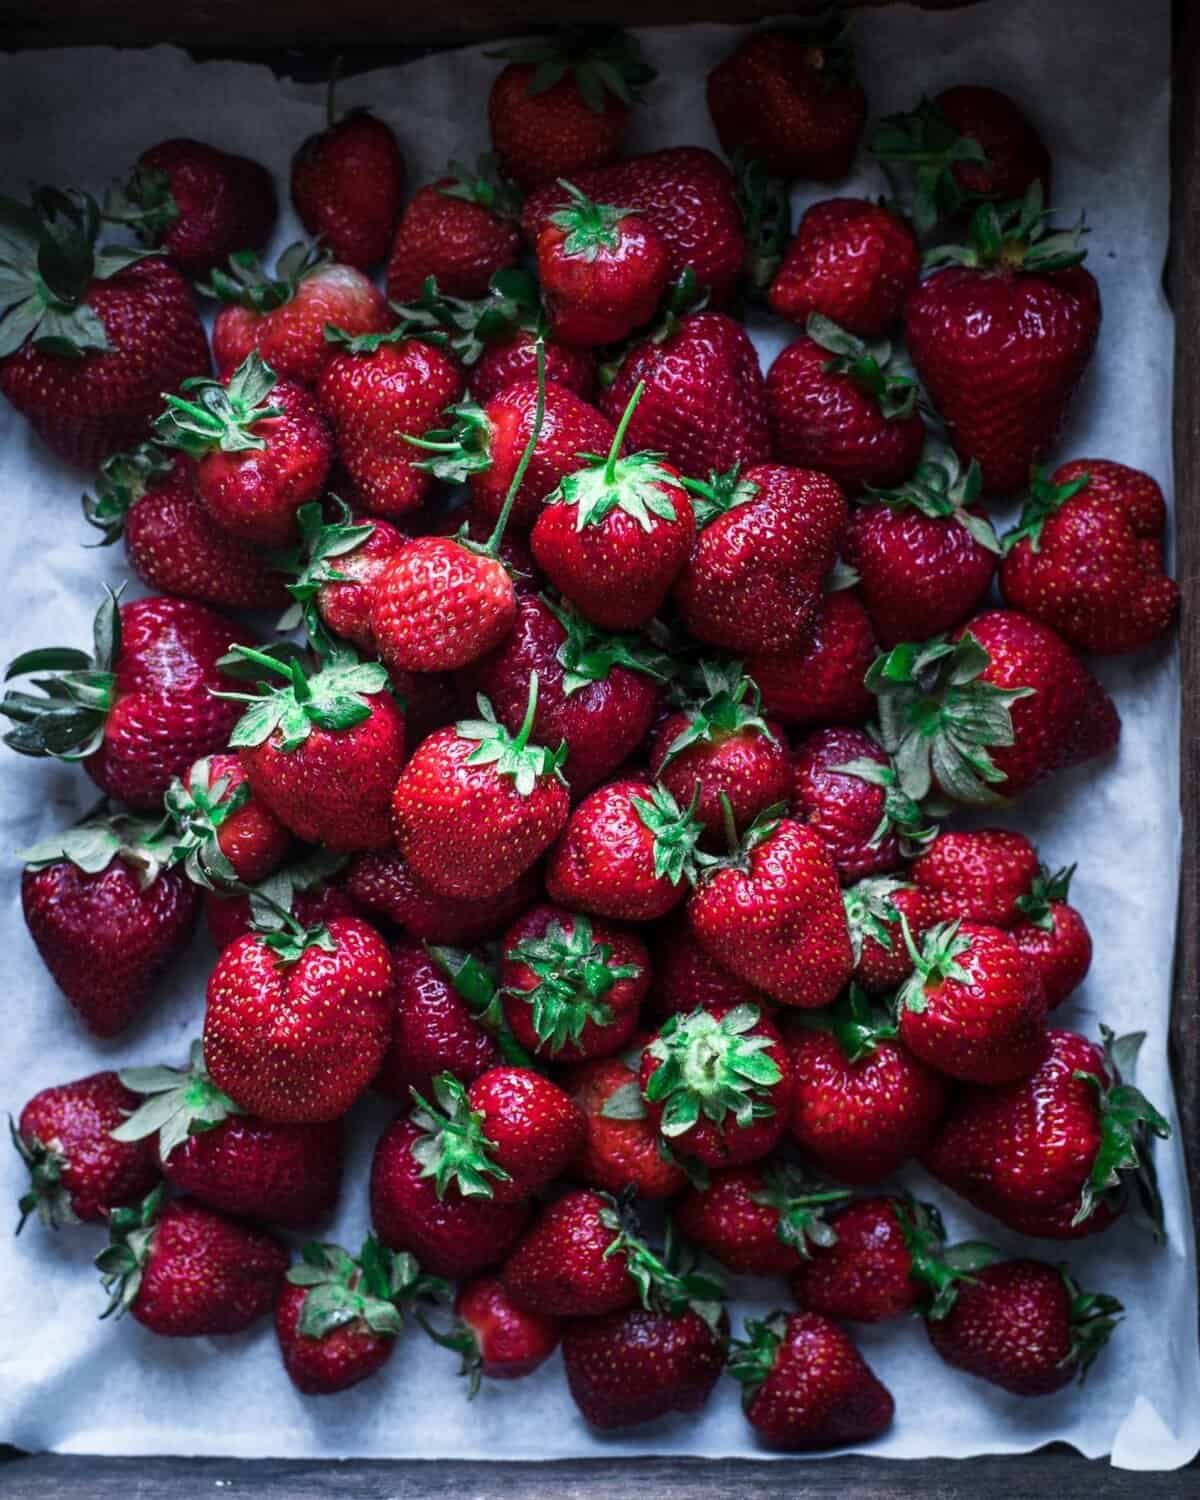
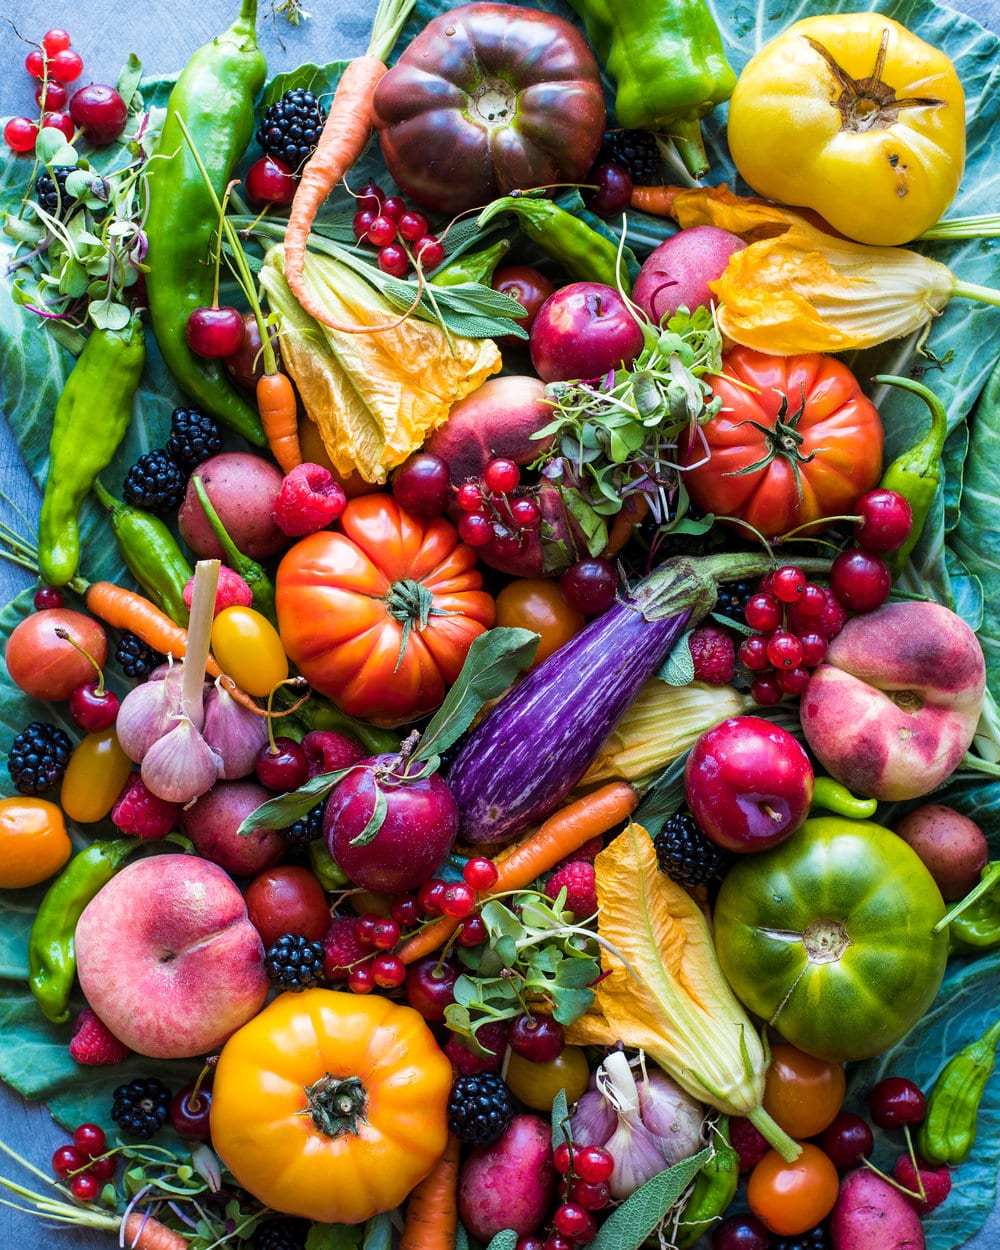
I am constantly finding inspiration from dozens of my favorite accounts on Instagram, along with Pinterest images, and even food magazines or online publications. I might see one photographer’s use of dark moody lighting and another photographer’s beautiful capture of fresh produce and think “hey, I should take a still-life-type photograph of fresh produce with dark moody lighting.”
Also, think about how you want to portray your food and what feelings you want your food to evoke. Do you want your viewers to feel a sense of rustic coziness when they see your food? If so, focus on (but don’t limit yourself to) shooting traditional comfort foods, gravitate towards simple wooden boards and crates, choose muted colors over bright ones, and leave crumbs, spills, or other human elements in your photos to make it feel realistic and homey.
Alternatively, if you’re into the bright airy look, you may want to overexpose your images a bit (but not too much, as you can never fully recover these blown-out highlights) and focus on light colorful props, such as baby pink or baby blue linens and white or light-colored surfaces.
Regardless of which style or styles you settle on, the process of figuring it out is so much fun and once you discover what works for you, it’s so rewarding to see your style grow and evolve.
I hope you enjoyed the third part of this series on Tips for the Beginner Food Photographer! For more tips, head on over to Part I, Part II, and Part IV of this series.Lots of love,
Nisha


Thank you very much for these tips Nisha! I would like to ask you how can I do to take flat lay photos with my conventional tripod.. I don’t have money to buy another one and I would like to know if you have any tips to do it. Thank in advance